 Watch TV reports!
 shop@masalo.eu
 +49 (0) 4131 - 727 15 97
Please apply your cuff using our “illustrated instruction manual”, read the further instructions on this page and also note our Questions and Answers page and the supplied instruction manual.
Please follow the instructions very carefully, because pain relief and healing can only be achieved with a correctly applied cuff.
Illustrated instruction manual
Your Subtitle Goes Here
Important note:
Please try on the Masalo Cuff in a clean and dry environment and be sure to handle the product with care. We can not offer a full purchase refund if the cuff is used for a longer period of time or shows obvious signs of wear.
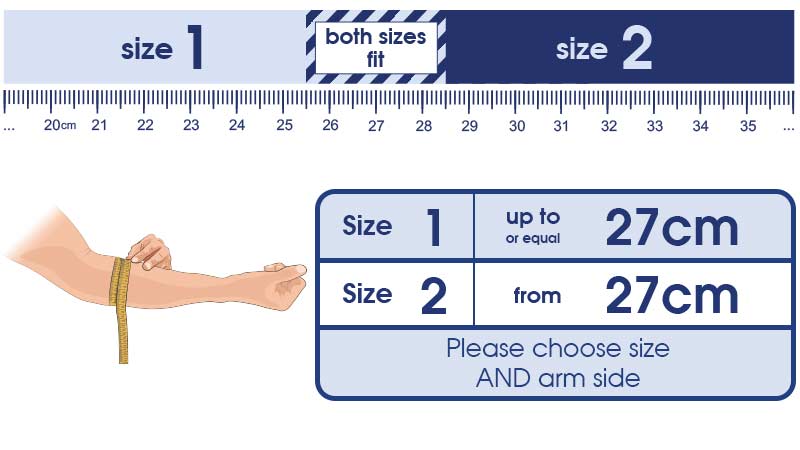
Measuring and size chart
Please note that you can achieve freedom from pain only with the correct size Masalo Cuff.
Therefore, please measure again the exact circumference of the thickest part of the affected forearm (measure in relaxed state with slightly stretched arm)
Compare the measurement you read with our size chart.
Between 25.5cm and 28.5cm both sizes are a snug fit, please choose size 1 if your forearm circumference is 27cm or less, choose size 2 if the circumference is more than 27cm.
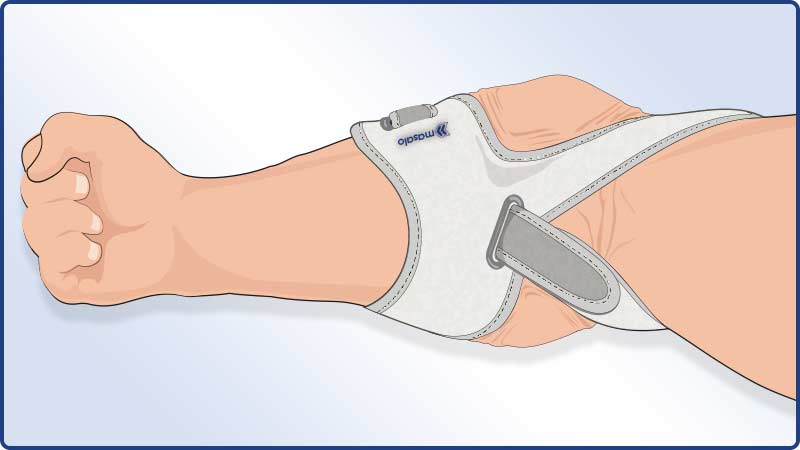
Putting on the cuff
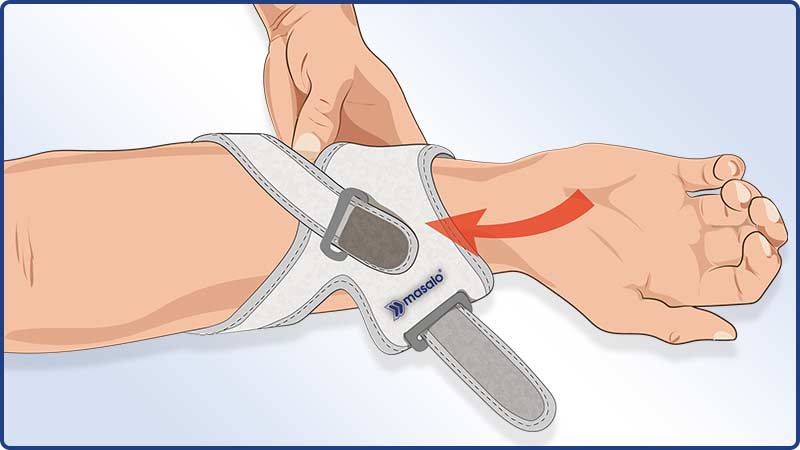
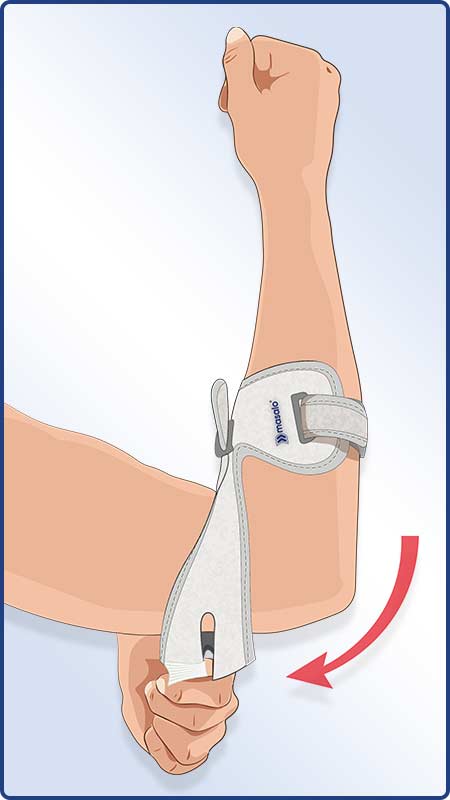
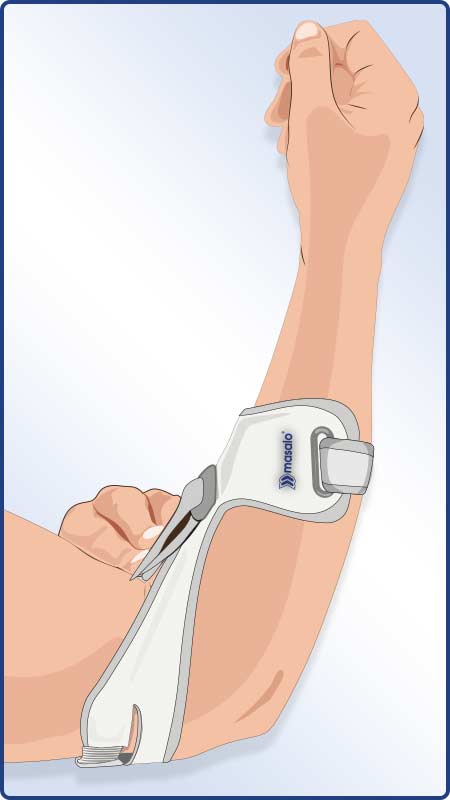
Take the cuff and open the two Velcro fasteners. Do not pull the straps completely out of the plastic eyelets if possible, however, if that happens, they can easily be passed through the eyelets again.
Pull the cuff over your hand as shown in the picture.
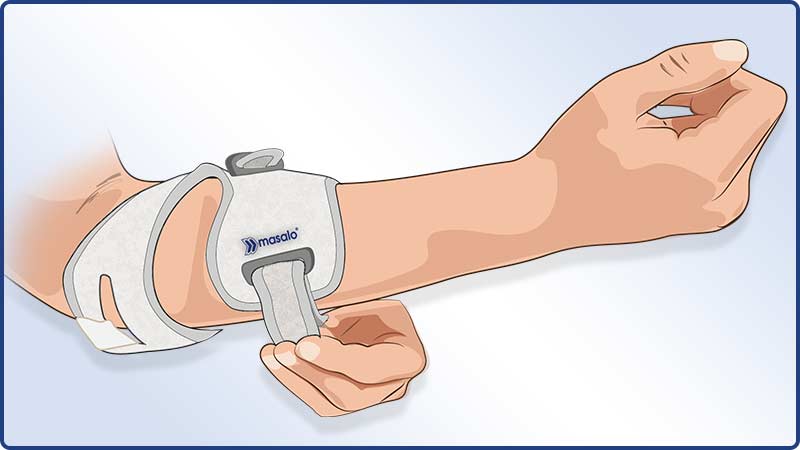
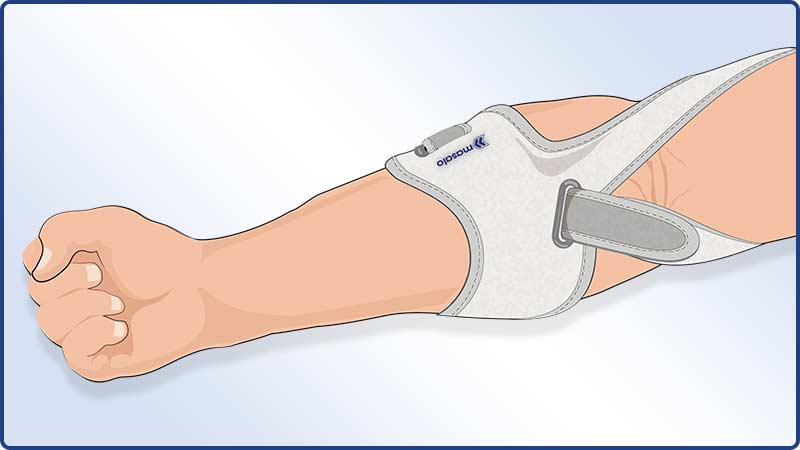
Slide the cuff to about the middle of the forearm and close the Velcro fastener so that the forearm cuff fits snugly on the arm.
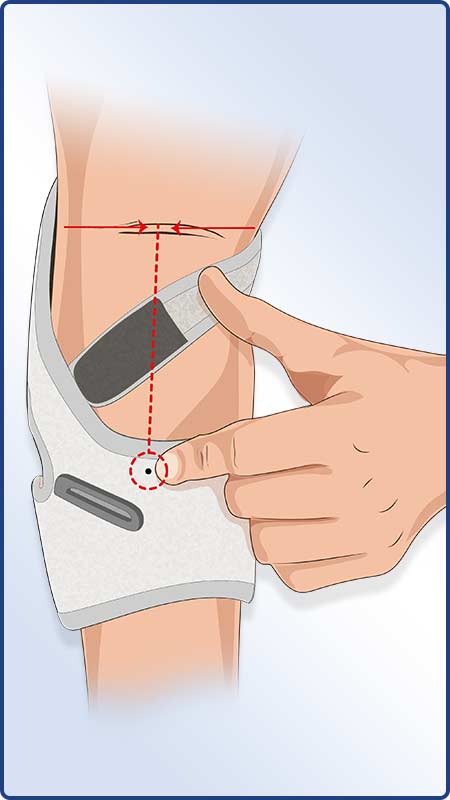
Position it so that the small dot marking on the forearm cuff lines up with the middle of the elbow/arm.
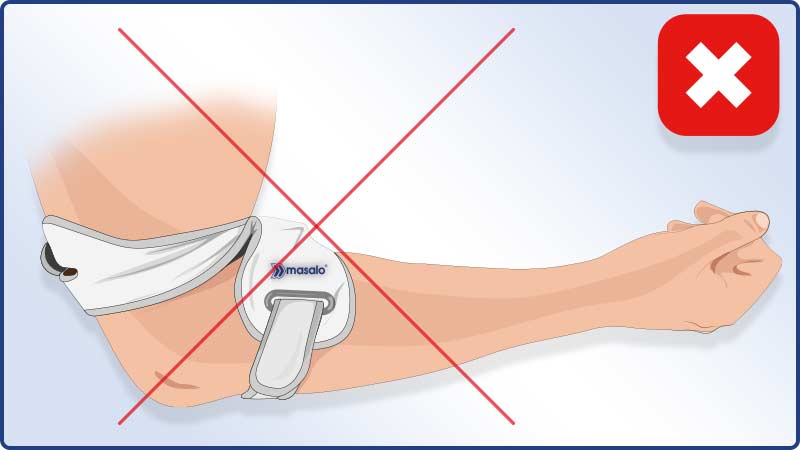
Please note: The forearm cuff is supposed to be located in the middle between the hand and the elbow and must not be placed too close to the elbow bend.
Make sure you maintain enough space in between!
Now adjust the upper arm strap in this position so that it fits well against the upper arm when the arm is bent.
If you now extend your arm, the counter-traction should be noticeable. The relief is noticeably greater or lesser depending on how you vary the positioning. You should have to exert force to straighten your arm.
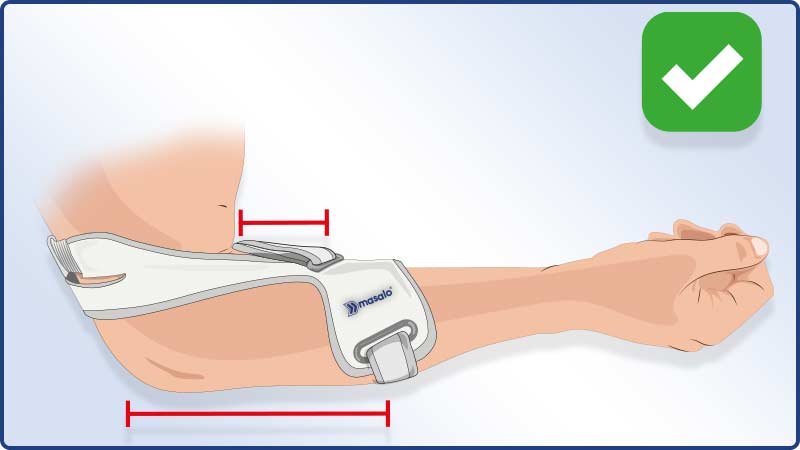
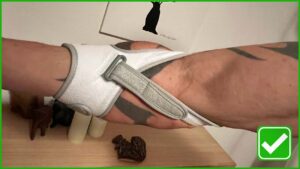
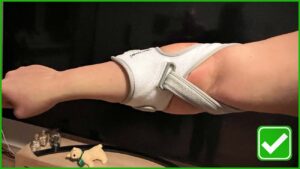
Correctly applied cuff
When the arm is extended, you will see a bulge/curvature between the forearm cuff and the elbow. This tells you that the cuff is working correctly and that the tendon insertions are relieved.
Feel free to use our “Right/Wrong” images for comparison (next chapter on this page).
Vary the settings until you have achieved the optimum position and relief for you. You can adjust the settings at any time to suit the situation (e.g. set them a little tighter for activities with a bent arm such as working at the computer, and loosen them a little as required for other activities; please also refer to our tips in the following sections.
It is recommended to wear the Masalo Cuff permanently for the first 14 days and until the injury has healed, and as regularly as possible when putting stress on the arm.
Important Notice:
The arm must not be immobilized with the cuff applied and must not remain in a rest position.
The arm must remain normally mobile and usable and should be moved as normally and as much as possible. Only when the arm is stretched/loaded a counter-traction/resistance should be felt.
If you have any problems putting on or wearing the Masalo Cuff, ask your dealer for advice or contact us at:
shop@masalo.eu
Cuff applied, now what?
Now you should either immediately – or within a maximum of 15-30 minutes – feel a significant relief, otherwise something is wrong.
If relief does not occur, adjust the cuff correctly again, or take it off and contact us.
Please do not use the cuff if you are not sure you want to keep it. We cannot provide a full refund of the purchase price if the cuff is used for a longer period of time or shows signs of use.
Important: The Masalo Cuff is a very effective bandage against epicondylitis and develops strong forces. Please use the cuff only if you have received an exact diagnosis of present epicondylitis from your physician.
You can also check the function/effect of the Masalo Cuff yourself with a small test, simply click on the “Function test” button below.
Feel free to use our “Right/Wrong” images for comparison (next chapter on this page).
If our cuff helps you, we would be pleased to receive a small user review from you or a recommendation to fellow sufferers, via Facebook, internet forum etc.
Wearing period
An epicondylitis may take a while to heal completely. Therefore a wearing period from 4 weeks to 6 months is not unusual.
The more consistently you wear the cuff (at best day AND night), the more it supports the healing process.
That is why we recommend the purchase of a second cuff so you can change it (after work, sports or washing) and thus always achieve an optimal effect.
Download application guide:
You can download our application guide including helpful righ/wrong pictures here as .pdf.
DOWNLOAD NOW
Application guide & right/wrong images
Your Subtitle Goes Here
Important note
The arm must not be immobilized with the cuff on; the arm must remain mobile and usable as normal; only when the arm is extended should a counter-traction/resistance be felt.
For “intentional” loads such as work and sports, or when working with the arm bent (e.g. at the PC), it makes sense to adjust the upper arm strap a little tighter, at night and in everyday life it can be loosened.
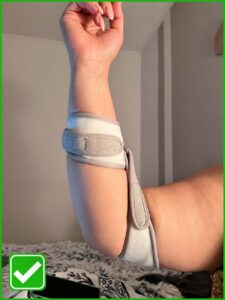
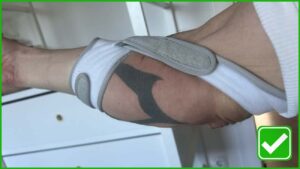
Correctly applied cuff
Please note that you can only achieve freedom from pain with the correct size and correctly applied cuff.
Check the fit of the cuff with the help of our right/wrong photos and use the case studies and solutions described.
For questions and problems please use our contact form.
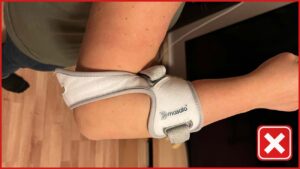
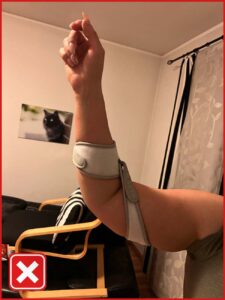
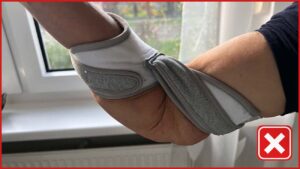
Case study I
Problem:
Forearm cuff too close to the elbow (arm can be stretched without effort)

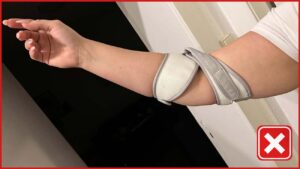
Solution:
Place the forearm cuff in the middle of the forearm (half between hand and elbow) and close it so that the forearm cuff cannot slide up further.
When the arm is extended, you will see a bulge between the elbow and the forearm cuff – the area of the injured tendons is relieved.
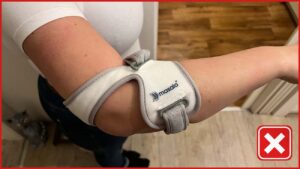
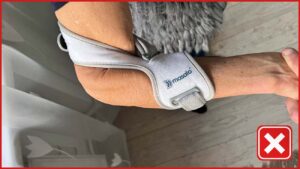
Case study II
Problem:
Upper arm strap adjusted too loosely, cuff does not work and slips off, the arm can be stretched through without resistance
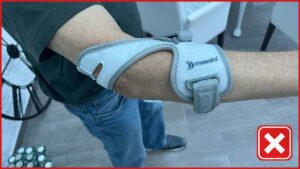
Solution:
Bend the arm and close the upper arm strap so tightly that the rubber does not protrude much in the position, the cuff lies well against the skin and stretching the arm is only possible with force and a bulge is visible between the forearm cuff and the elbow.
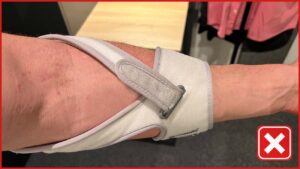
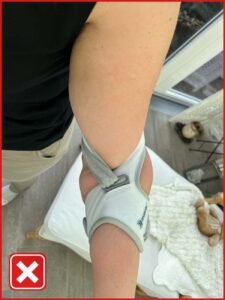
Case study III
Problem:
Upper arm strap is fastened too far towards the shoulders, thus immobilizing the arm, or strap slips off when moved several times.
Solution:
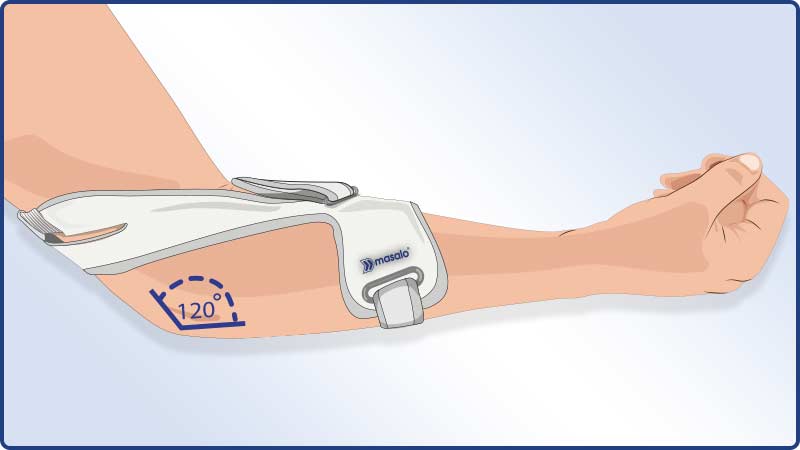
The upper arm strap should sit just above the elbow bone and must not be pulled up too far. As a small guide, the cuff should reach about a 90 degree angle if the arm is also angled about 90 degrees.
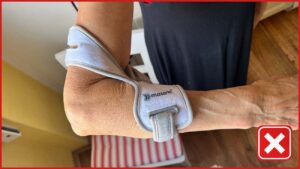
Case study IV
Problem:
The cuff is set too tightly, the arm cannot be stretched to any extent and the blood circulation may be disturbed, the arm remains in a resting position.
Solution:
Tight settings are useful for acute pain as well as heavy, intentional exertion such as work or weight training, but these settings must be changed after the activity has ended. The arm should always be able to be stretched with effort, and blood circulation should not be permanently compromised.
Download application guide:
You can download our application guide including helpful righ/wrong pictures here as .pdf.
DOWNLOAD NOW
Instruction video
Your Subtitle Goes Here
Function test Masalo Cuff
Your Subtitle Goes Here
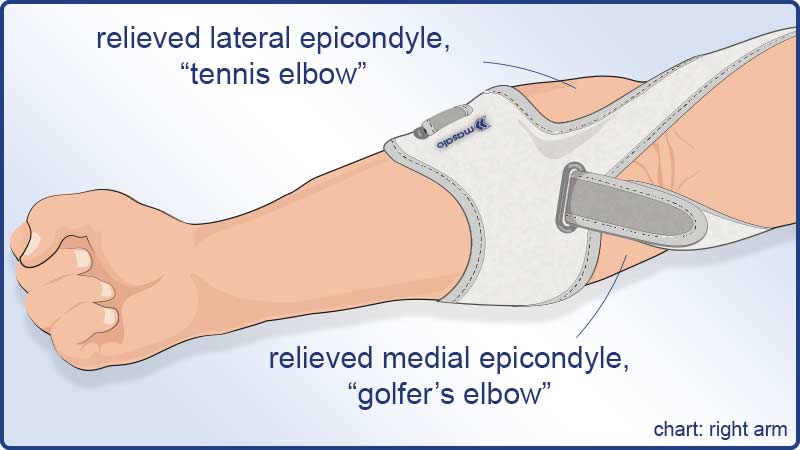
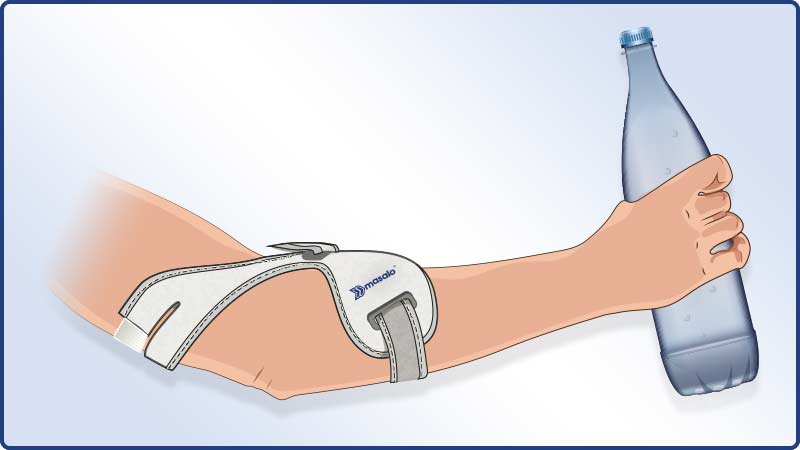
Quick test of the Masalo Cuff for tennis elbow
This is a small test of the effectiveness of the correctly applied Masalo Cuff for lateral epicondylitis (tennis elbow) – for the golfer’s elbow at least the relief must be clearly noticeable, but this test is not suitable for golfer’s elbow:
- put down the Masalo Cuff
- take a full 1.5 liter PET bottle
- Extend your arm and try to lift the bottle in this way – there should be a pain of strain as you do so
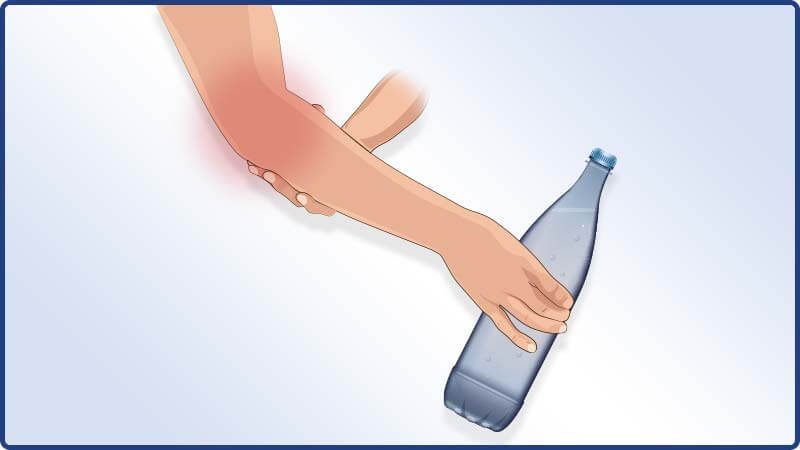
- Now put on the cuff and adjust it a little tighter for the test (you can loosen the cuff again at any time, the tighter it is adjusted at the beginning, the more relief you will achieve and feel)
- now stretch the arm with full force into the counter-traction
- lift the bottle
- Ideally, the pain now no longer occurs at all, so you can lift the bottle without pain, or the pain is significantly reduced.
If you can successfully perform this test, the cuff is effective. You now need patience for your tennis elbow to heal.
Please try different settings until you find the optimal position and settings for you.
Tips & tricks about the Masalo Cuff
Your Subtitle Goes Here
General notes
The tighter you initially set the Masalo Cuff and the greater the counter-traction, the greater the relief on the tendon insertions. A tighter setting and greater relief is advisable, especially at the beginning. In principle, the arm can also be extended with the cuff in place, but we recommend that you refrain from fully extending the arm, at least for the first time (2-4 days), as far as your daily routine allows. Gradually, you will get used to the cuff, find the optimal settings and be able to use your arm normally again.
The Masalo Cuff is NOT intended to immobilize the arm, but performs its function best when the arm is moved as normally as possible. Through the arm movements in interaction with the cuff, the forearm muscles are permanently massaged, loosened and stretched in the direction of the tendon insertions.
We recommend wearing the cuff day and night if possible in the initial period (1-2 weeks) and wearing it as regularly as possible until the injury has healed and when stress is placed on the arm.
Important: The Masalo Cuff is a very effective bandage against epicondylitis and develops strong forces. Please use the cuff only if you have received an exact diagnosis of epicondylitis from your physician.
For more tips on treating tennis elbow and golfer’s elbow, please also read our tips on the “How to treat the epicondylitis” page.
The right “twist”
If you want more relief or if you feel that the cuff is “pressing” on the pain point (tendon insertion), please change the settings according to one or more of the following points until you find your optimal settings:
- Rotate the forearm cuff a little further to the outside or inside of the arm
- Change the position of the forearm cuff (further towards the hand or closer to the elbow)
- Adjust the upper arm strap tighter or more loose
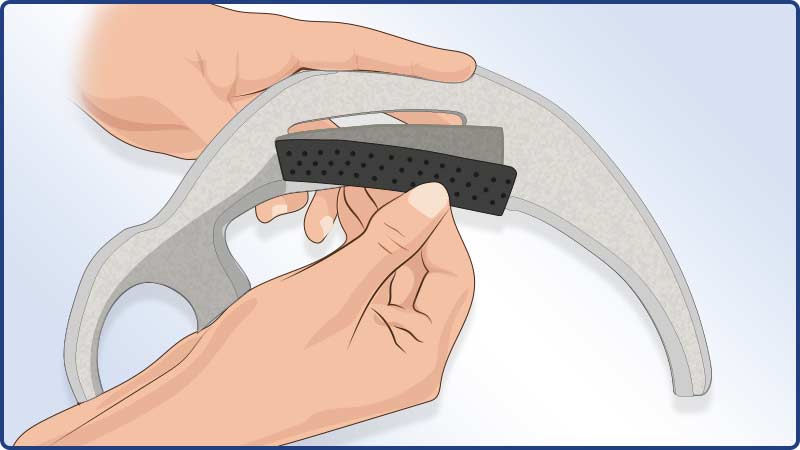
The silicone velcro strap
Inside the upper arm strap you will find a small “band” with silicone dots, which is attached to the strap with Velcro.
You are also welcome to remove this strap, but you should keep it in a safe place for later use.
This Velcro strap is designed to increase comfort and ensure that the upper arm strap does not slip off the arm, even with slightly looser settings. Depending on the activity, you can change the position of the strap individually.
Improve wearing comfort
In case of acute sensitivity to touch at the tendon insertions, set the upper arm strap slightly higher and adjust it slightly tighter. You may not be able to fully extend the arm this way, but you will achieve great relief.
This setting should be changed again after 2-4 days.
Alternatively or additionally, you can change the position of the forearm cuff (further towards the hand or closer to the elbow).
Additional note
If the cuff is set very tightly and extreme stress is applied, it is possible that the Velcro fasteners may exceptionally come loose. This is a desirable effect to ensure blood circulation throughout. Change the settings if necessary.
If you experience circulation problems during normal exercise, please readjust the cuff accordingly.
Care instructions & washing the cuff
Your Subtitle Goes Here
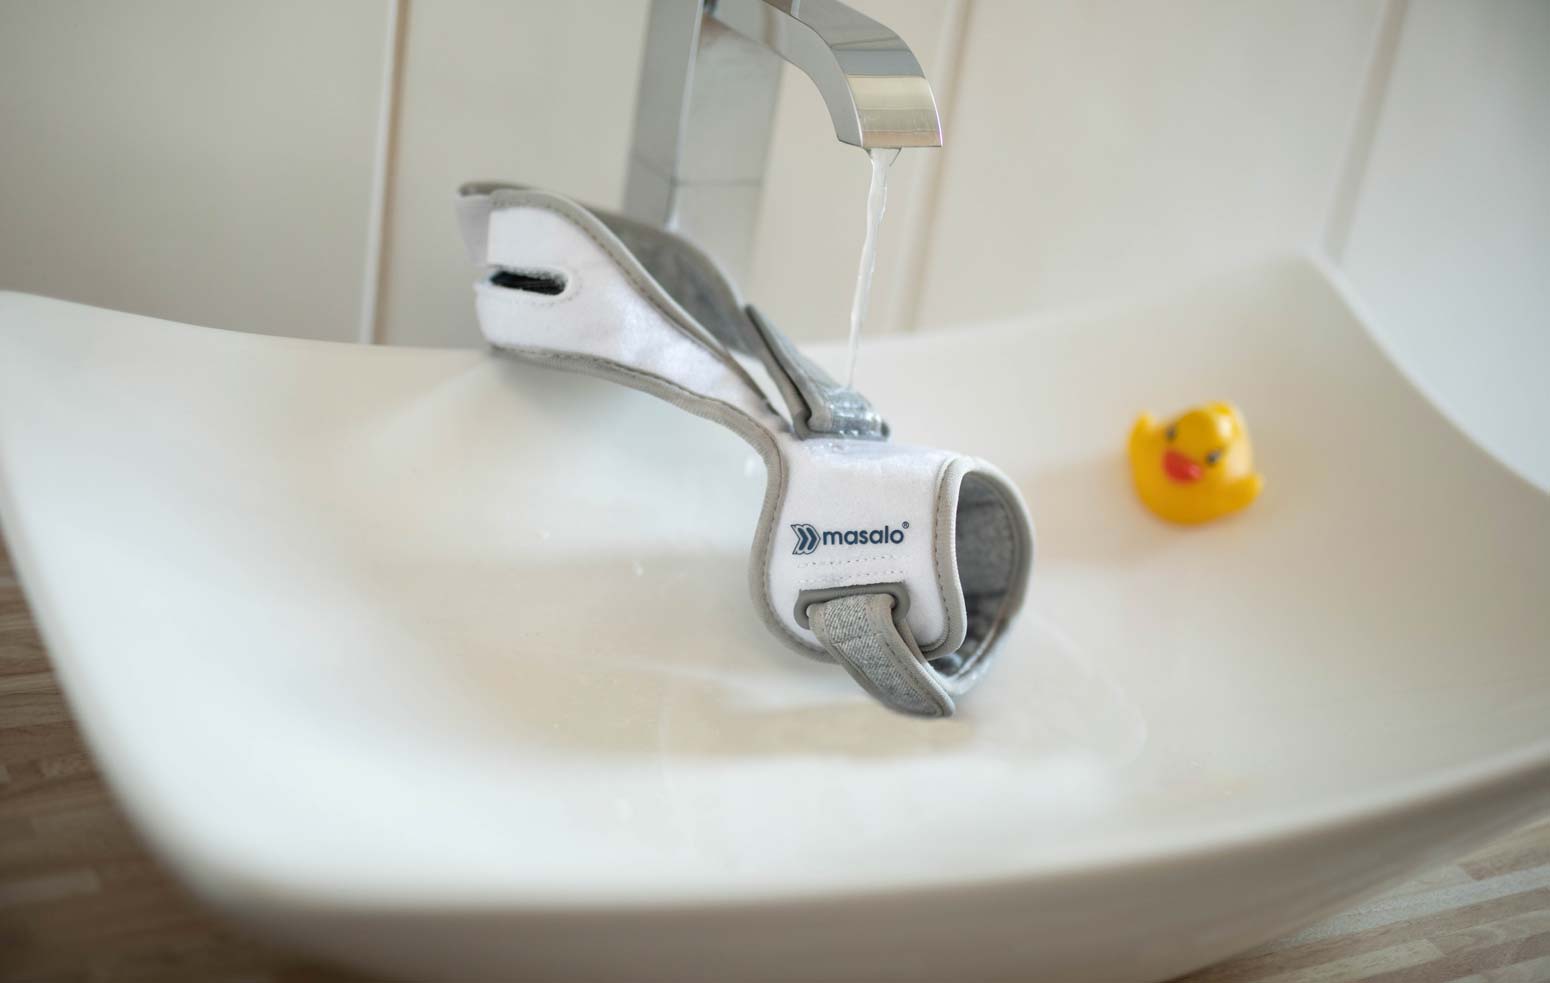
Washing the cuff
The Masalo Cuff can be washed by hand at 30°C.
As a cleaning agent, please use commercially available detergents (without bleach).
To maintain the functionality of the Velcro fasteners for a long time and to avoid damage, we recommend closing the fasteners before washing.
When drying, do not expose the product to direct heat (e.g. heating, sunlight, etc.).
Do not tumble dry under any circumstances!
Download instruction manual
Your Subtitle Goes Here
Download instruction manual:
Here you can obtain the instructions for use for the Masalo Cuff for practical download as a .pdf file.
This file is of course 100% safe and virus-free and is similar to the info brochure that was enclosed with your order.
DOWNLOAD NOW
Support & Contact - Can we help you?
Your Subtitle Goes Here
We want every cuff to help as much as possible and, in the best case scenario, we want every one of our customers to be able to beat their epicondylitis with the help of our product.
For questions about
- Exchange, wrong size
- Return
- Cuff care & washing
or if you are simply unsure, please be sure to read our “Questions and Answers” page and then contact us. We will be glad to help you!
Support & Contact
In order to be able to help you optimally and quickly, we need the following data from you:
- Your forearm circumference (thickest part, measured in a slightly stretched, relaxed state).
- Photos of your arm with the cuff attached
Instructions for the photos:
- Attach the cuff and stretch your arm as much as you can
- Take one picture each of the outer side of the arm as well as of the inner side of the arm (preferably while standing)
- Use a wide angle so we can see everything from elbow to the wrist
- Please reduce the file size if possible
Then please send the whole thing by mail with problem description and order number (if applicable) to:
support@masalo.eu or via our contact form
ORDER NOW!
Order 100% safe and convenient in our online store!
Free shipping within Germany!